
How to Set Up Facebook Business Manager the Right Way
One of the most common questions we’re asked by our friends in the automotive world is “What is the best way to set up my Facebook ad account?”
Facebook offers a handful of advertising options for any business. While they all offer unique benefits, only one Facebook advertising option allows you to manage everything in one place: Facebook Business Manager.
Why You Need Facebook Business Manager to Manage Ads
First of all: What is Facebook Business Manager?
Business Manager is a platform where you can create and run Facebook ads and also manage all of your company’s Facebook assets, including pages, ad accounts, people, pixels, Offline Events sets, and more.
After you set up a Business Manager account, you can create a Facebook Ads Manager within it.
The main reason for using Business Manager is that it allows you to manage all of your Facebook marketing efforts in one location. Here’s a full list of the key benefits of Business Manager:
- Centralize the management of all your Facebook advertising efforts: You can add and remove assets and people as needed, right from Business Manager.
- Separate your professional and personal accounts: Your team members can sign up via business.facebook.com to log into your shared business assets.
- Manage permissions: Business Manager is especially important for businesses with more than one Facebook page and/or with marketing teams. Why? It allows you to add, share, and remove assets and team members as things change over time. You can also give different levels of access to people with various roles on your team.
- Share assets with outsiders: If you hire a digital marketing agency to manage your social media or digital advertising, you can grant external access to your existing assets and/or create new assets for them to use. Sharing your assets this way allows your business to retain ownership of your ad accounts as agencies and staff members come and go.
- Get better support from Facebook: Facebook wants all businesses to use Business Manager so it can offer more specific instructions and help. If you have a technical issue, Facebook will ask you right away if you’re using Business Manager, so it helps to have one set up.
- Make things easier on yourself in the long run: Most businesses today have just a Facebook page and an ad account set up on an employee’s personal Facebook profile. But over time, the number of employees and accounts on your Facebook page can complicate the way your business monitors, engages, and advertises on Facebook. So even if you have only a few assets, it’s important to switch to Business Manager sooner than later.
Now that you have an understanding of how Business Manager works, it’s time to get your own account set up so you can get your ads rolling!
How to Set Up a Business Manager for Facebook Advertising
With just a few very easy steps, any marketing professional can set up a Facebook Business Manager account and start advertising.
1. Head to Business.Facebook.com and Create Your Account
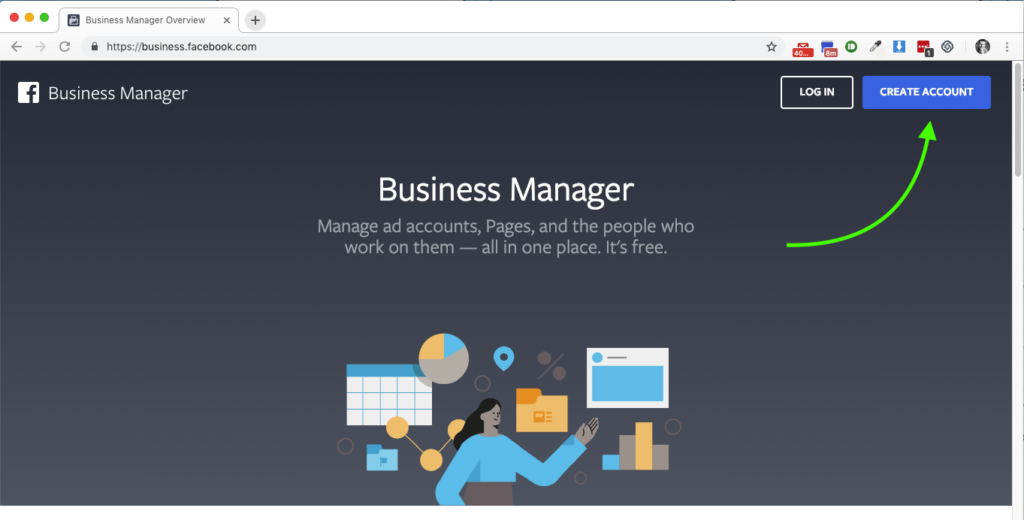
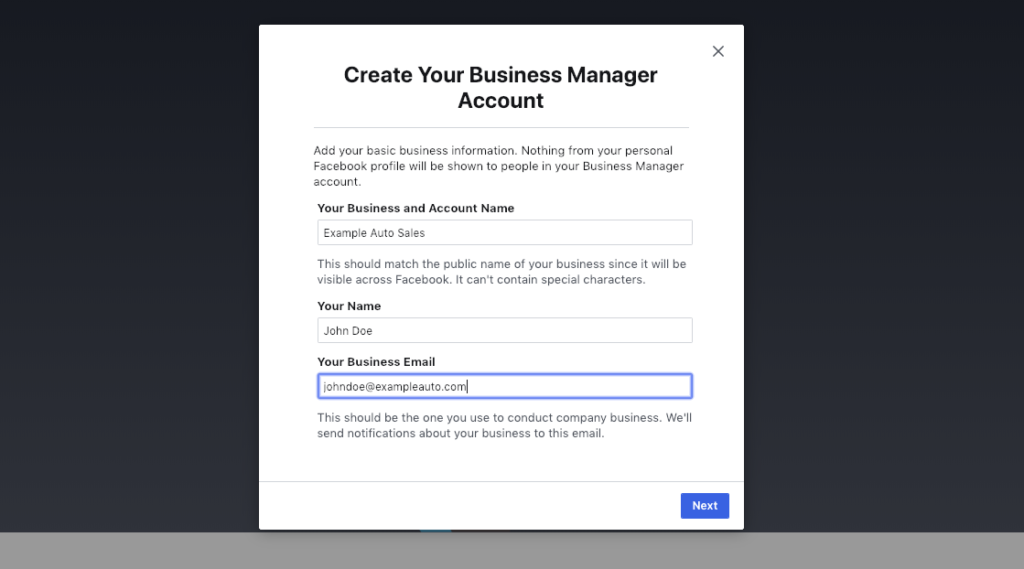
Facebook will ask you to log into your personal account, but you may opt to create a separate Facebook account just for using Business Manager.
2. Create an Ad Account Within Your New Business Manager
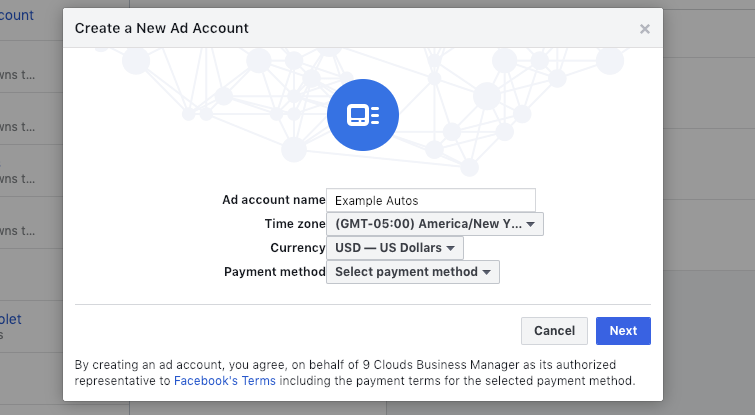
The ad account is where you put your credit card information, so we typically recommend creating one ad account for every credit card you want to use. As an example, if you’re an auto dealer and want to separate your billing for sales and service, set up two different ad accounts with two different credit cards.
3. Connect Your Facebook Page
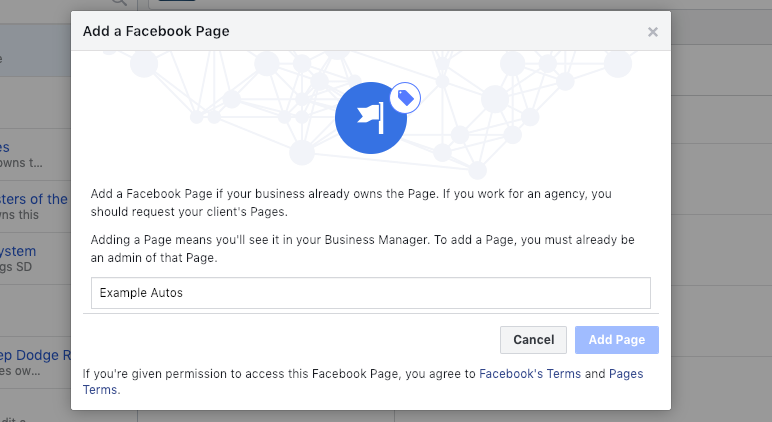
Facebook ads are placed by a Facebook page. Most businesses already set up a Facebook page, but you’ll want to connect your pre-existing page to your Business Manager so that you can manage and run ads from your page. In Business Manager, just click Business Settings > Pages to get started.
4. Create (and Install) Your Facebook Pixel
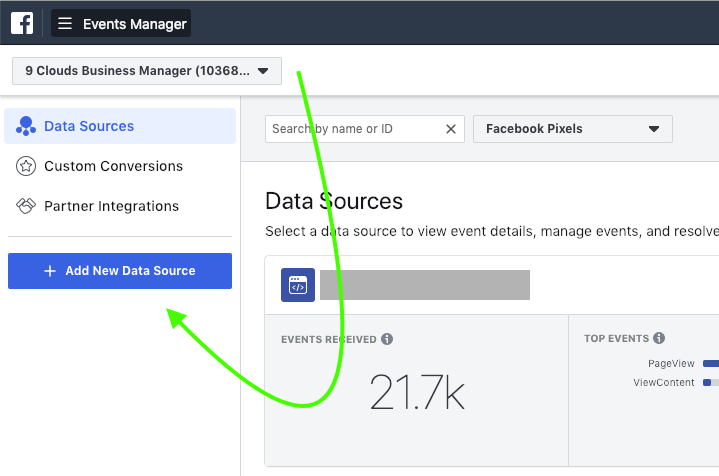
The Facebook tracking pixel enables retargeting ads and advanced tracking. In short, the Facebook pixel is your eyes and ears on your website.
We recommend one Facebook pixel per website. In Business Manager, click Business Settings > Events Manager > Pixels to get started.
5. Connect Instagram to Your Business Manager
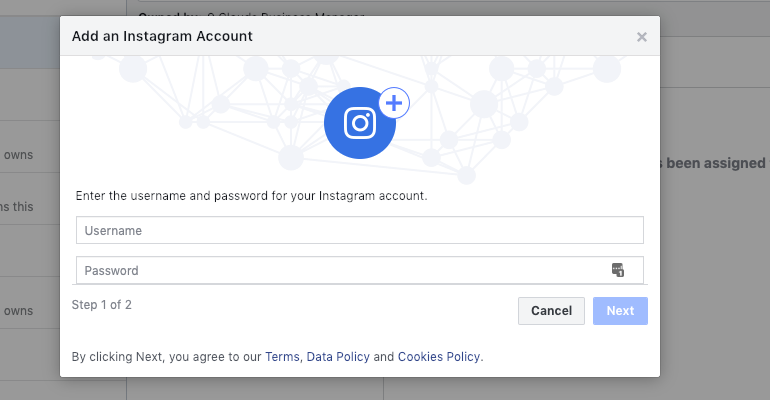
Facebook owns Instagram, which means you can run ads on both platforms at the same time. Connect your store with more potential customers by integrating your Instagram account with Facebook Business Manager.
In Business Manager, click Business Settings > Instagram to get started.
6. Create an Offline Events Set
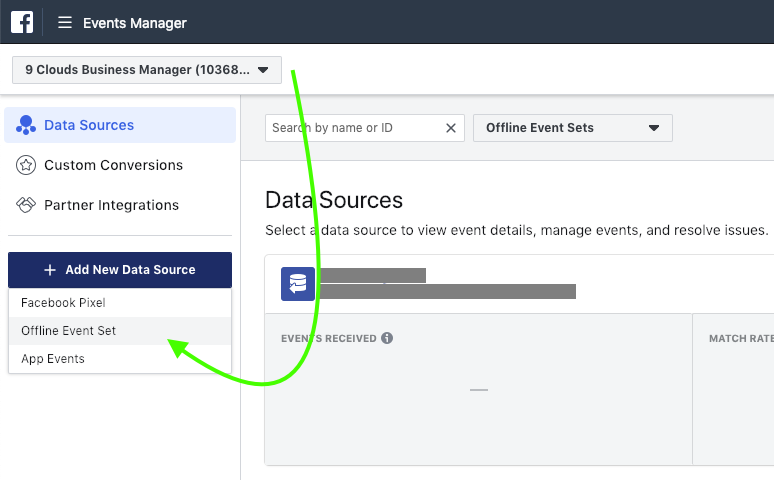
Your Offline Events set calculates which sales in your store were influenced by a Facebook ad. You can upload the revenue or income from each sale, and Facebook will tell you how much money you made. This makes it easy to calculate the return on investment (ROI) of a campaign.
In Business Manager, click Business Settings > Events Manager > Offline Event Sets to get started. After you create an Offline Events set, make sure to assign it to your ad account (see step #2).
Psst: To make the Offline Events setup way easier, use our new tool, Hydra. You’ll save time and streamline the process!
7. Connect Your Facebook Ads With Your Sales Team
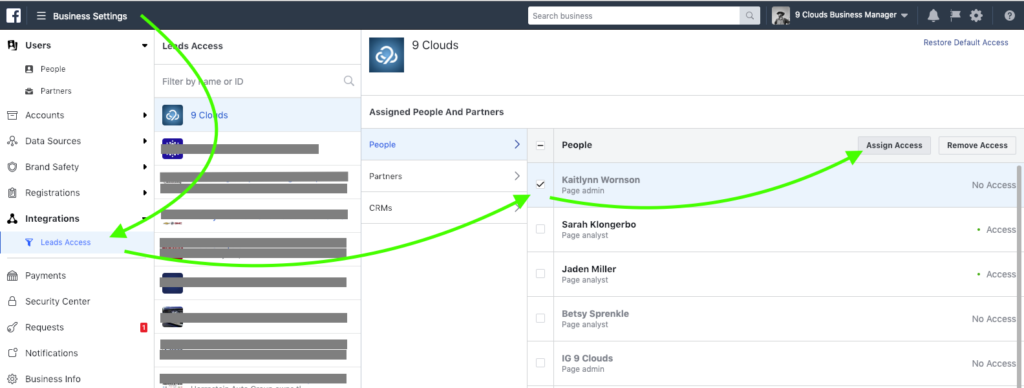
Facebook can send leads directly into your customer relationship management (CRM) system or even email leads directly to your sales reps.
Two sites help to connect your leads with your CRM: Zapier and LeadsBridge. To use either of these sites, make sure you have admin access to your Facebook page and ad account. Alternatively, set admin access for leads only to enable you or your employees to successfully set up the connection.
You can manage lead access in Business Manager by clicking Business Settings > Leads Access.
8. Add People and Partners to Your Assets
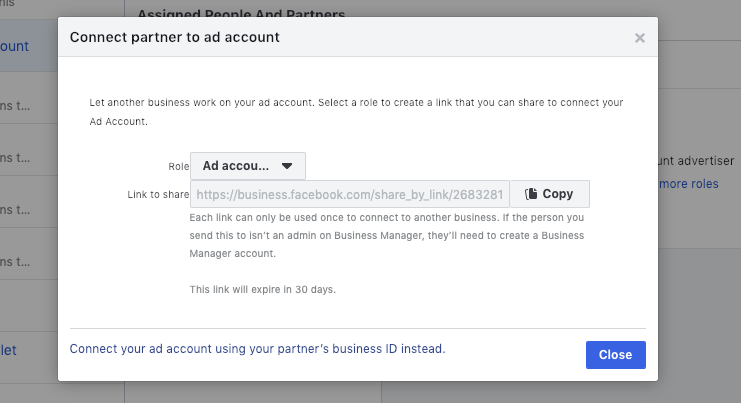
Quickly scale your Facebook marketing efforts using People and Partners.
People is where you can add employees and control what they can see and do. Partners is the best way to add an agency; that way, you control the agency’s level of access, but the agency can add its own employees into your accounts.
In Business Manager, click Business Settings > People. Or, along the top, choose Partners, and add your partner’s business ID.
How to Create an Ad in Ads Manager
Once you have all your pages, pixels, and people arranged in Business Manager, it’s time to create your first Facebook ad!
The easiest way to get started is to click your ad account’s name in the list under Business Settings. We recommend keeping this link as a bookmark in your browser so that you can easily monitor your ads.
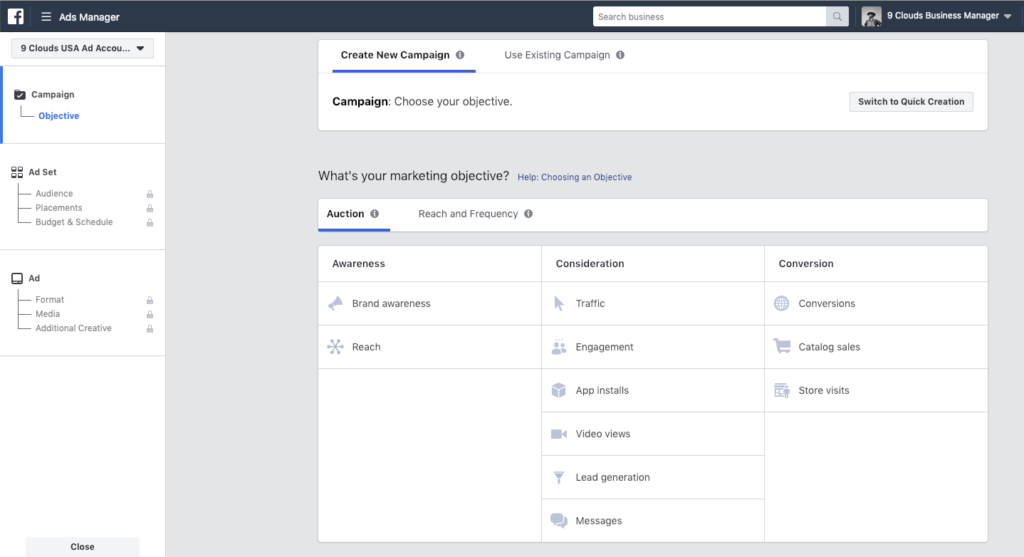
On the ad creation screen (shown above), you’ll notice that there are several objectives to choose from.
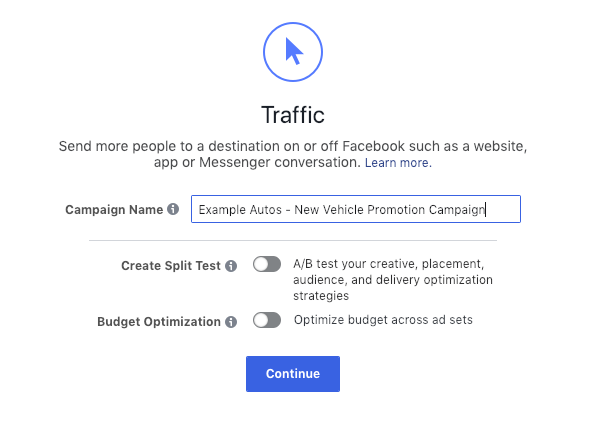
In most cases, you will want to send people to your website to view your products, in which case you should choose the Traffic objective. From there, you will name your campaign and click the Continue button.
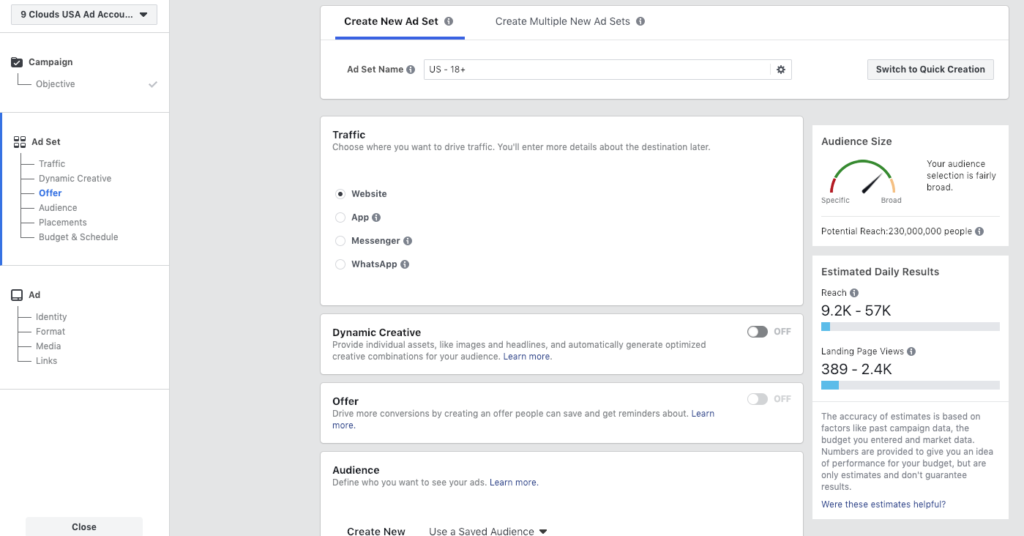
On the next screen, you’ll configure the ad set. Specifically, you’ll choose your time frame, targeting, ad placement, and budget.
You’ll then be brought to the ad creation screen, where you’ll configure all the creative aspects of the ad, including the format, images, videos, text, and links.
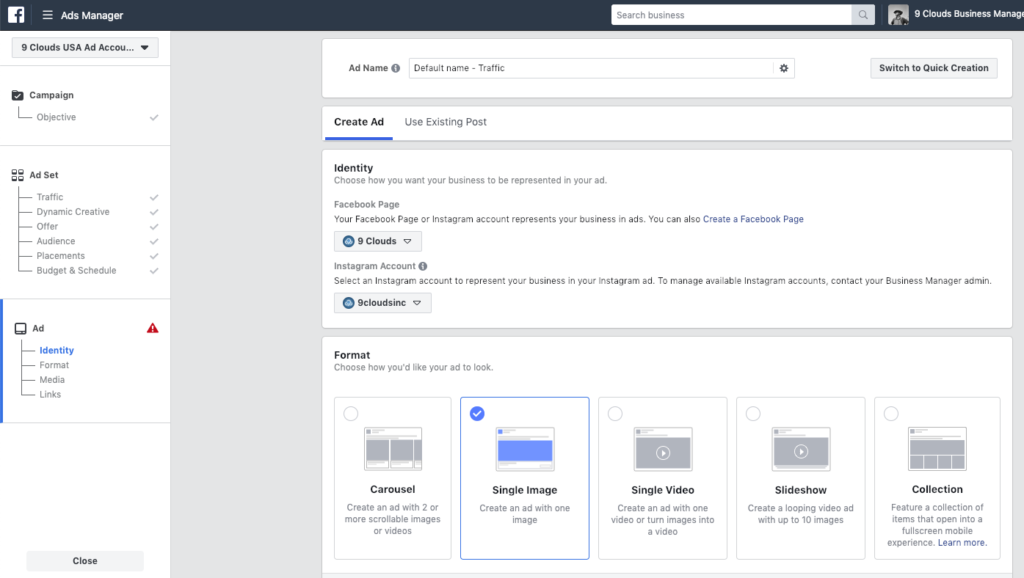
The first step is to choose the specific Facebook page for the ad. If you connected your store’s Instagram account, you’ll also see the option to choose that account on this screen.
When your ad content is configured, make sure to check the Conversion Tracking section at the bottom of the screen. Verify that the pixel and the Offline Events set are both connected to your ad account before clicking Confirm to upload and launch your ads.
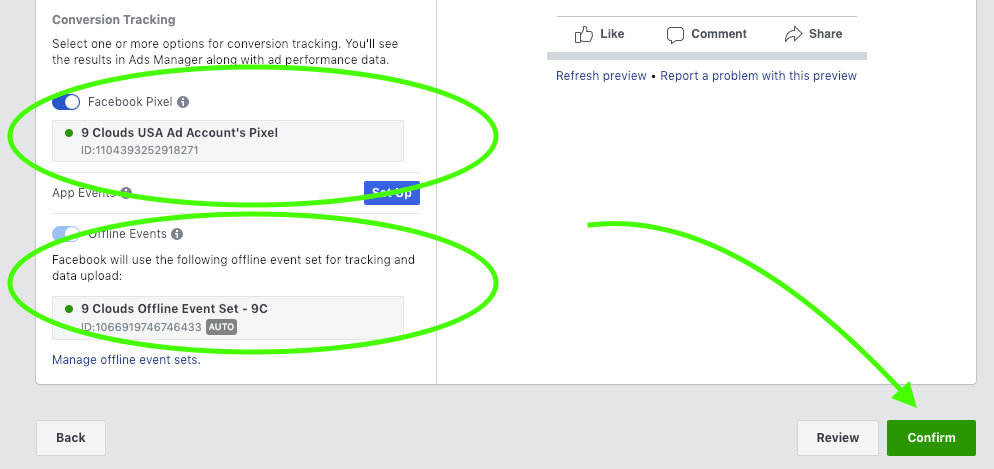
When you upload your ads, Facebook will review the content to make sure it suits its guidelines and will notify you of any errors or warnings. (If your ad is disapproved, here are five possible reasons why.)
From there, you’ll be able to save a link to the specific ad campaign, or navigate back to your Ads Manager via business.facebook.com.
Happy Advertising!
Our team at 9 Clouds has created an entire library of free Facebook advertising resources for you to check out anytime.
Interested in having an agency manage your Facebook ads?
9 Clouds offers a wide range of services for Facebook advertising. Ask for a free digital assessment today to see if we might be the right fit for your business.
SEE HOW WE CAN HELP WITH FACEBOOK ADS »


